I recently met a woman who asked me to do three very different sewing skills for her.
1. Restore a shredding antique quilt.
2. Combine two store-bought comforters into one large one (the edges are worn away and shredded).
3. Machine quilt a top she made from her parents’ clothing.
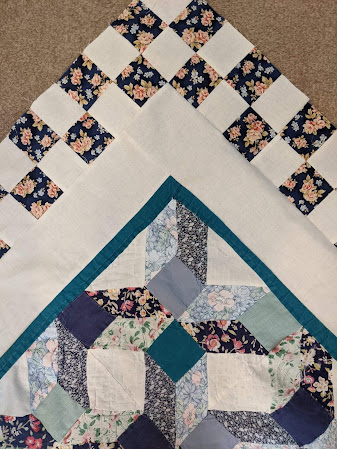
I have put about 10 hours into restoring the antique top. She agreed to pay me by the hour, so I am keeping track. Time goes a lot faster than I think it does. I LOVE doing this kind of meticulous work, so it flies! It took about 3 hours for me to take all the hand-stitching out. There was a quilt center, then a 4” wide muslin border, then a pieced border, then two more single-fabric borders. Hardly any part of anything except the center was salvageable. I even had to replace many ripped up pieces from the center. I used a similar fabric for them. With fabric that old, it is difficult to find the colors let alone similar prints. Here are some pictures of what I replaced with the last two pictures being what it looks like now. I am putting one wide border on after the checkerboard one. It is called “slub”. It looks like linen, but with some threads thicker. It is mind green like the original outermost border.


